
Nominal Ledger Mapping allows you to determine which QuickBooks accounts should be used when payroll information is exported from Ocerli.
Because each organisation’s Chart of Accounts and accounting requirements may be different, there is no single recommended Debit or Credit ledger setup. The steps below show you where to manage your mappings and highlight some useful tools to help you complete the setup.
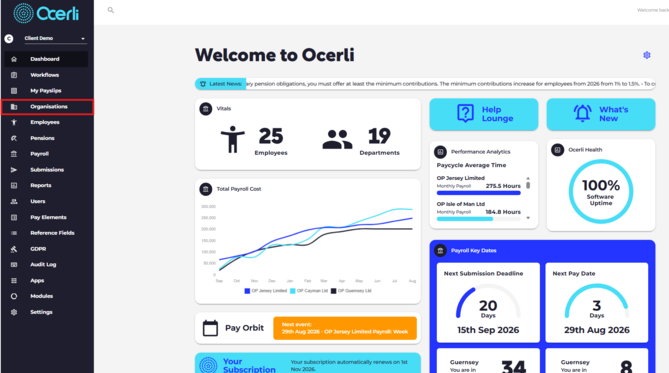
1. Open the 'Organisations'
From the main menu, go to Organisations and select the organisation you want to update.
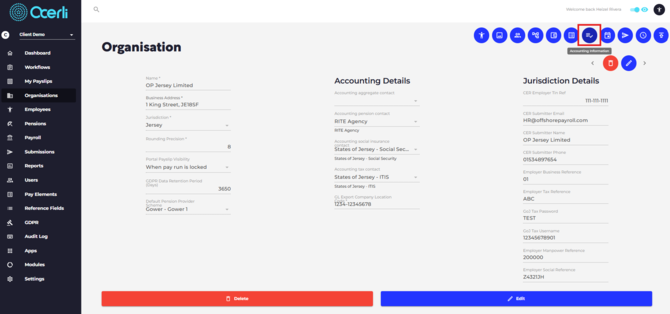
2. Open 'Accounting Information'
3. Review the 'Chart of Accounts'
Select the Chart of Accounts tab.
The Chart of Accounts displays the accounts currently available from your connected QuickBooks account.
Before setting up Nominal Ledger Mapping, it is useful to review this section and confirm that the accounts you expect to use are available.
Tip: If you have recently created or updated an account in QuickBooks and it is not showing in Ocerli, refresh the integration data first, then return to the Chart of Accounts to check again.

4. Open 'Nominal Ledger Mapping'

5. Locate the Pay Element
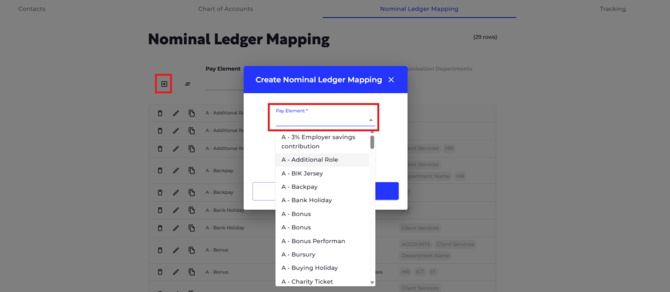
6. Add the Mapping
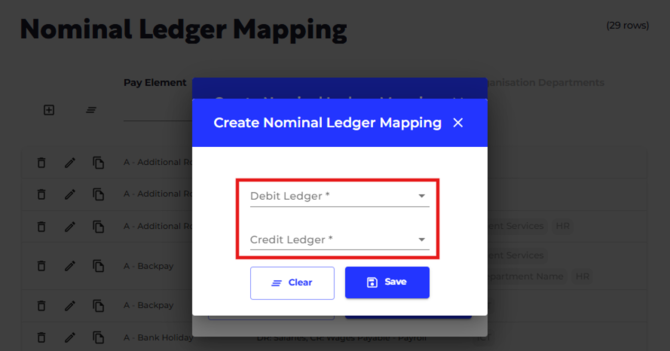
Select the appropriate Debit and Credit ledger accounts based on your organisation's accounting requirements.
Important: Ocerli does not determine which Debit or Credit account should be used. The correct accounts will depend on your organisation's Chart of Accounts and accounting setup. If you are unsure, please confirm the required mapping with your accountant or finance team.
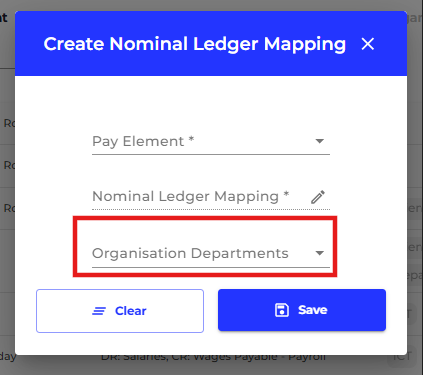
7. Apply Department Mapping if Required
If your organisation uses departments, you can apply the mapping to the relevant Organisation Departments.
This allows different mappings to be used where required for different areas of the organisation.
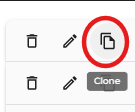
8. Use the Clone Option Where Appropriate
If an existing mapping is similar to the one you need to create, use the Clone icon to copy the mapping.
You can then amend the cloned record as required.
Tip: Always review the Debit and Credit accounts after cloning a mapping before saving it. The cloned setup should only be used as a starting point.
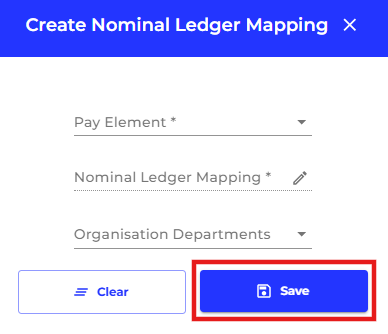
9. Save and Review the Mapping
Once the required accounts and departments have been selected, save the mapping.
Review the Nominal Ledger Mapping list to make sure the pay element now shows the intended setup.
Important Notes
- Ocerli does not determine which Debit or Credit account should be selected for your organisation.
- Your mappings should reflect your own QuickBooks Chart of Accounts and accounting requirements.
- When using Clone, treat the copied mapping as a starting point and review the Debit and Credit accounts before saving.
- If you introduce new pay elements in Ocerli, best practice is to map the pay element in the nominal ledger mapping area.
- If you make changes to your QuickBooks accounts, remember to refresh the data in Ocerli and review your Nominal Ledger mappings to make sure they are still appropriate.